Cannabis Leaf Guide - Anatomy, Deficiency Diagnosis, and Every Problem Explained
Cannabis leaf health is one of the most reliable windows into a plant's wellbeing. Yellowing tips, curling edges, brown spots, and strange discoloration are all the plant communicating something specific. The challenge is learning to read that language accurately. Misdiagnose nitrogen toxicity as overwatering and you'll make things worse. Confuse a pH lockout for a deficiency and you'll add nutrients to a plant that already has plenty. This guide covers cannabis leaf anatomy, how to identify the three main leaf types, a complete visual diagnosis system for common problems, and step-by-step fixes drawn from real cultivation data. Struggling plants or healthy ones, this is your reference either way.
Cannabis Leaf Anatomy - Understanding What You're Actually Looking At
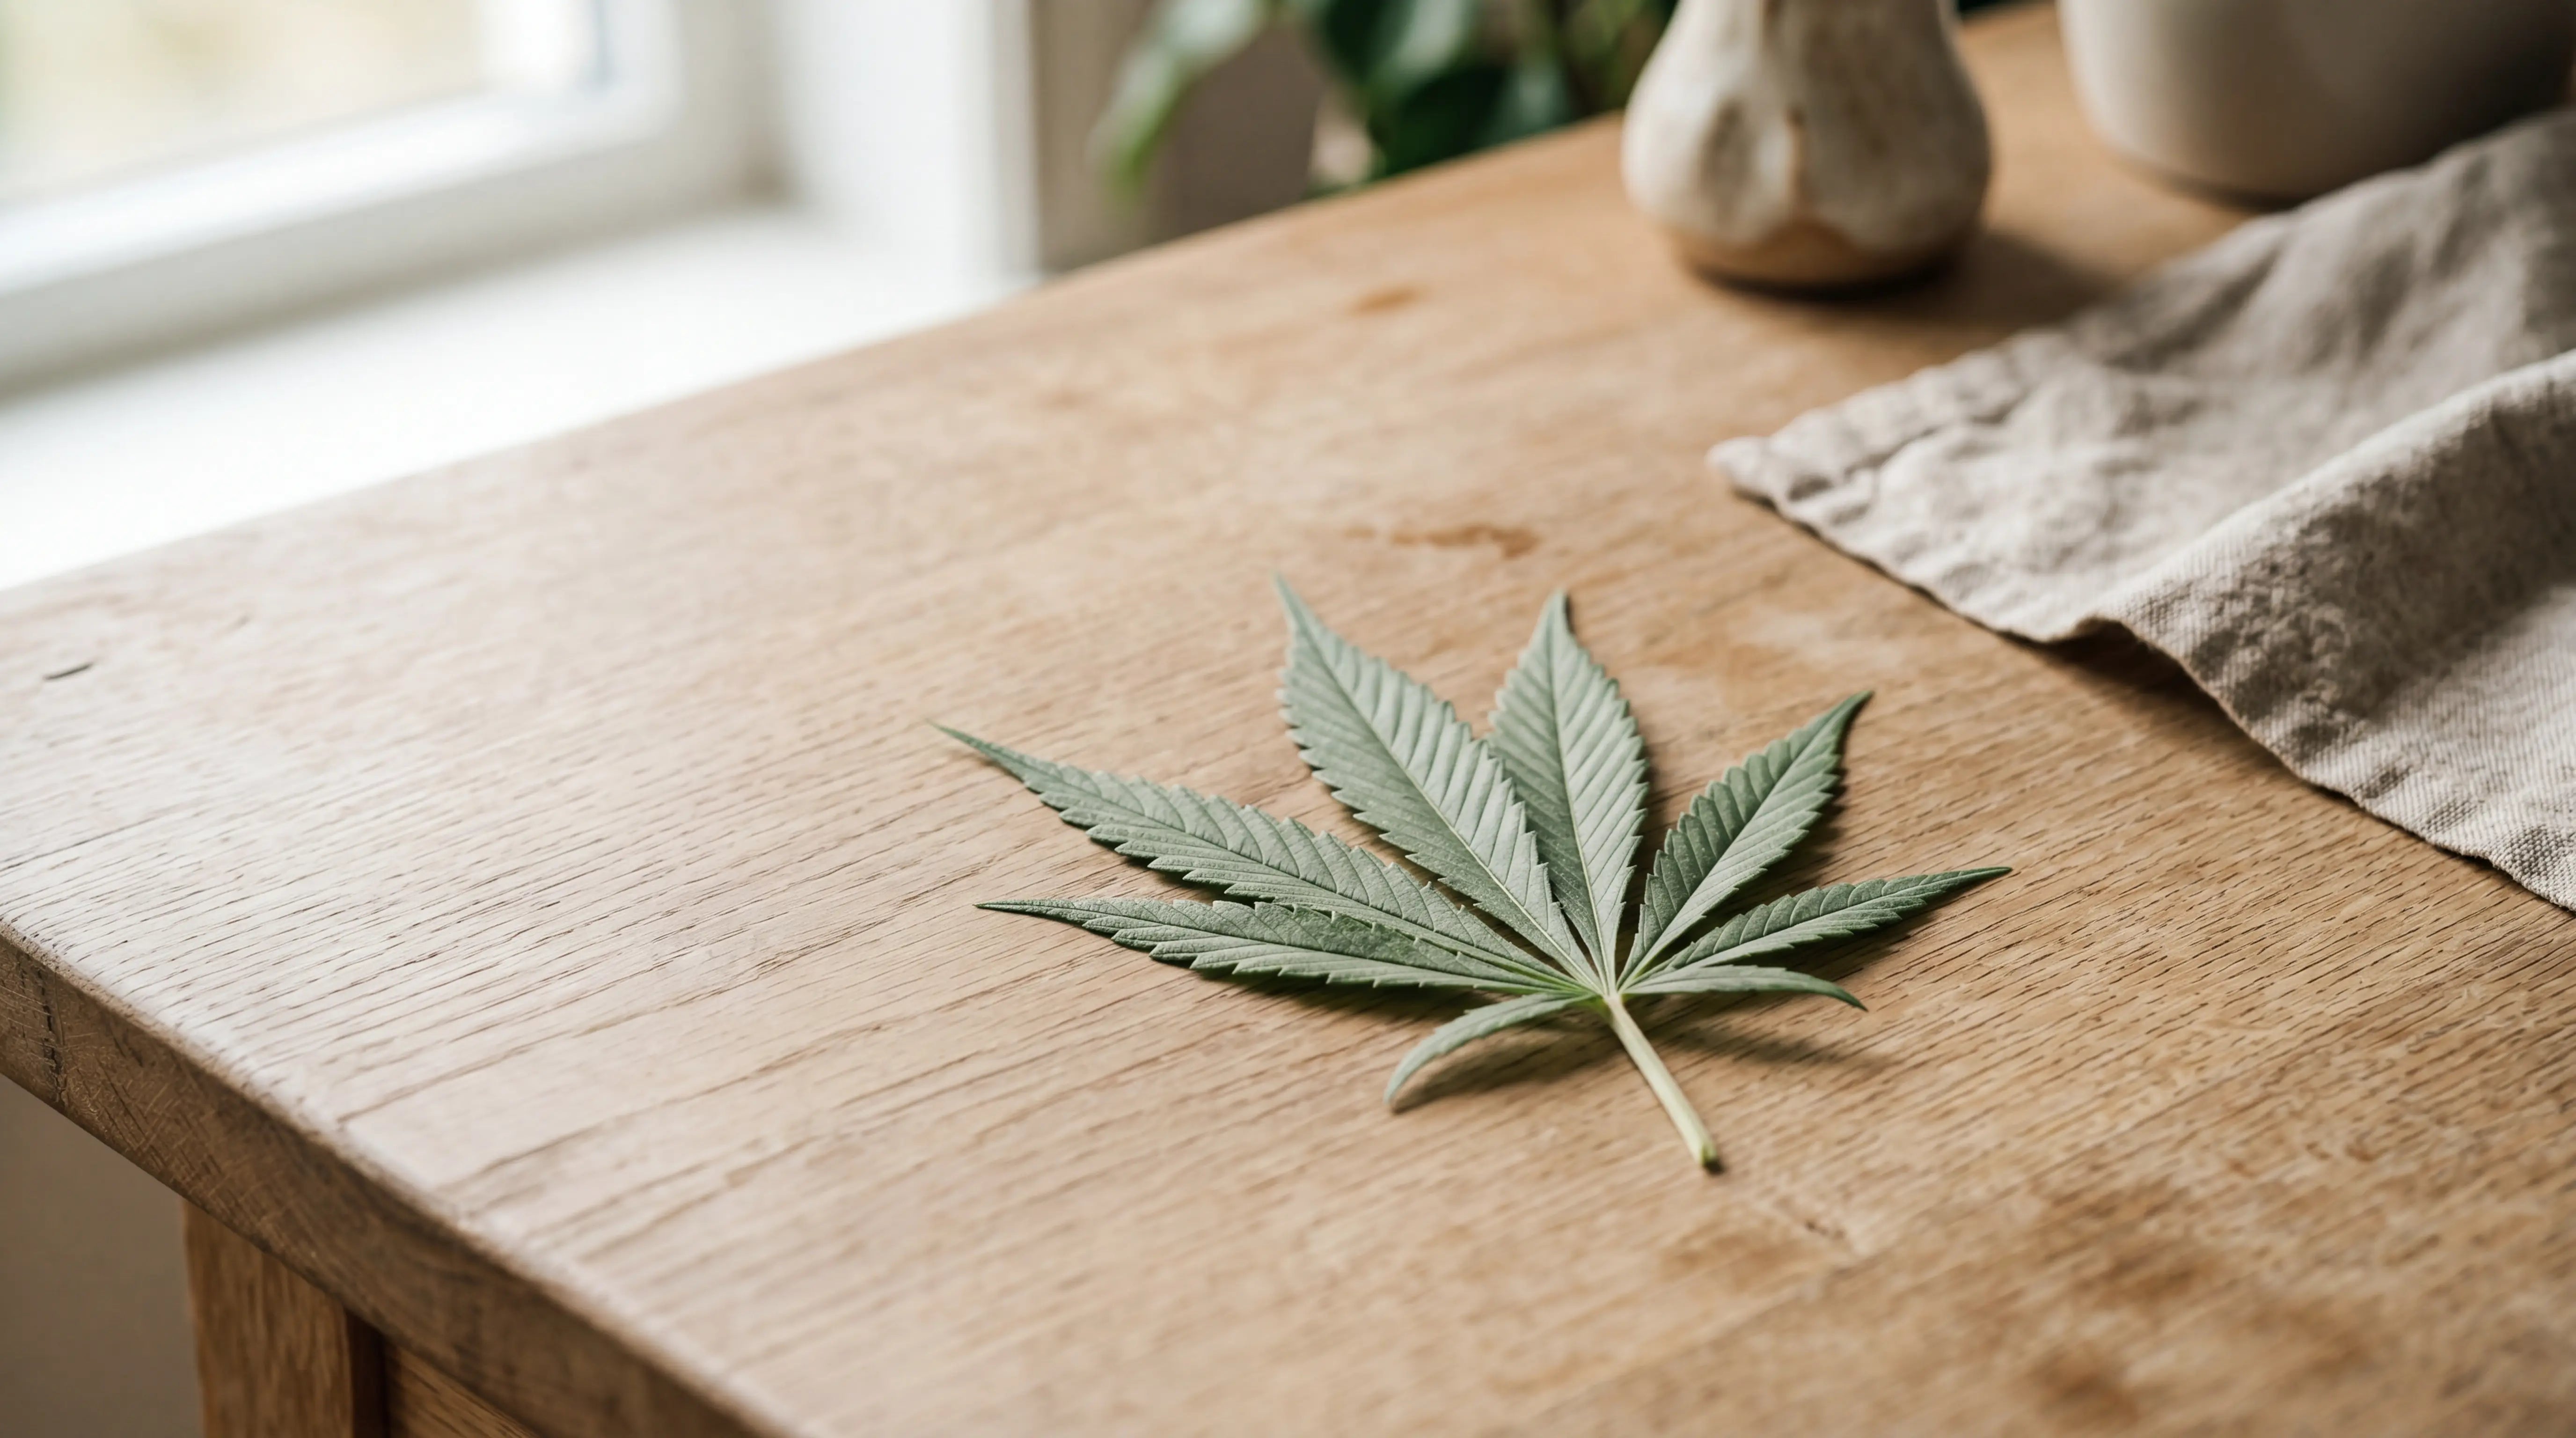
A cannabis leaf is a palmately compound leaf, meaning the individual leaflets fan out from a single central point, the way fingers spread from an open palm. Each leaflet attaches to a thin central stalk called the rachis, which itself connects to the main plant stem via the petiole (the leaf stem you can see running down to the node).
The number of leaflets per leaf changes throughout the plant's life. Seedlings start with a single-leaflet leaf. As the plant enters vegetative growth, leaflet count climbs through 3, 5, 7, and peaks at 9 leaflets during mid-to-late veg, typically around the 6th through 13th leaf on the plant. After that, leaflet count gradually declines again. Research has tracked leaf area peaking at roughly 6,726 mm² at the 12th true leaf, with serration count per leaflet reaching its highest point (about 35 per leaflet) near leaf 14 before declining toward the end of the plant's life cycle.
Leaf arrangement also shifts as the plant matures. On the first 11 nodes, leaves grow opposite each other. From node 12 onward, growth shifts to an alternate pattern where leaves emerge on alternating sides. This is a reliable botanical marker of vegetative maturity.
The Three Types of Cannabis Leaves
Understanding the three leaf types helps growers make smarter decisions about pruning, harvest timing, and post-harvest use.
Fan leaves are the large, iconic leaves. Their primary job is photosynthesis: converting light, CO2, and water into the sugars and energy the plant runs on. The underside of every fan leaf is covered in tiny pores called stomata, which regulate gas exchange and transpiration. Fan leaves are relatively low in trichomes and cannabinoids, making them useful as photosynthetic powerhouses rather than as smokable material.
Sugar leaves are the small leaves that grow directly out of or right beside the buds during flowering. They are heavily coated in trichomes, the resin glands that produce and store cannabinoids and terpenes. Sugar leaves are what make trimmed buds look frosty. They're worth keeping during processing because their cannabinoid content is meaningfully higher than that of fan leaves.
Cotyledon leaves are the first two round, oval leaves that emerge when a seed germinates. These are embryonic seed leaves with no leaflets, no trichomes, and no significant cannabinoid content. They fall off naturally once the plant establishes its first true leaves. If cotyledons yellow early and drop cleanly, that's normal. If they yellow before the first true leaves appear, it can signal a seedling stress issue.
Sativa vs. Indica vs. Ruderalis Leaf Shapes
The three primary cannabis types produce visually distinct leaves:
|
Characteristic |
Cannabis Sativa |
Cannabis Indica |
Cannabis Ruderalis |
|
Leaflet shape |
Long and narrow |
Short and wide |
Short and narrow |
|
Leaflet count |
9 or more |
~7 |
3-5 |
|
Color |
Lighter green |
Darker green |
Light green |
|
Leaflet width |
Very thin |
Noticeably broad |
Thin |
Cannabis sativa leaves are elongated with very slender leaflets and a lighter green color. Cannabis indica leaves are broader and darker, with wider leaflets packed closer together. Cannabis ruderalis leaves are noticeably smaller, with just 3 to 5 leaflets, and the plant itself rarely exceeds 2.5 feet in height. Ruderalis plants flower 3 to 4 weeks after germination, regardless of light cycle, which is the trait that makes them valuable for autoflowering hybrids.
Most cannabis available today reflects mixed genetics. Finding a plant with a textbook-pure sativa or indica leaf structure is increasingly rare. Hybrid leaves fall somewhere in between, which is why leaf shape is a general guide rather than a definitive strain identifier.
What Trichomes on Leaves Actually Do
Trichomes appear as a frosty, crystalline coating on sugar leaves and (to a lesser degree) on fan leaves. They serve several functions beyond cannabinoid production. Trichomes protect the plant against UV radiation, repel insects, and reduce moisture loss. The cannabinoids and terpenes they store are concentrated in the bulbous gland head at the top of each trichome. Our post on why cannabis is sticky breaks down trichome resin in more detail.

Cannabis Leaf Deficiency - How to Read Symptoms Correctly
The most common mistake growers make is treating visible leaf symptoms as proof of a deficiency and immediately adding nutrients. That logic fails about half the time, because nutrient lockout (where nutrients are present in the medium but cannot be absorbed by roots) is at least as common as actual deficiency, and the fix is opposite: a pH-correct flush rather than more feeding.
Before touching your nutrient mix, check pH. For soil cultivation, the optimal range is 5.8-6.8 (with 6.3 being the practical sweet spot). For hydroponics, target 5.5-6.5. A pH reading outside these ranges causes roots to lose the ability to uptake specific nutrients, regardless of what's in the solution. That's why the same leaf symptom can mean "add this nutrient" or "flush with pH-correct water," depending entirely on your pH reading.
Mobile vs. Immobile Nutrients - The Location Rule
Where symptoms appear on the plant tells you which category of nutrient you're dealing with.
Mobile nutrients (nitrogen, phosphorus, potassium, magnesium, molybdenum) can move within the plant. When the plant is short on them, it pulls those nutrients from older, lower growth and redirects them to newer growth. So deficiencies in mobile nutrients show up first in the lower and older leaves.
Immobile nutrients (calcium, boron, copper, iron, manganese, silicon, zinc) cannot be relocated once deposited. When these are deficient, new growth suffers first because no reserves can be moved to support it. Deficiencies in immobile nutrients appear in upper, newer growth.
This single rule eliminates roughly half the guesswork in cannabis leaf diagnosis. Any cannabis leaf showing uniform yellowing in the lower canopy almost always points to N, P, K, or Mg. Upper leaf problems first, before lower leaves show symptoms, point to Ca, Fe, or another immobile nutrient.
The Most Common Deficiencies - What Each One Looks Like
Nitrogen deficiency is the most impactful deficiency by yield. Research on controlled hydroponic grows found that nitrogen deficiency reduced vegetative biomass by 73%. Symptoms begin as pale yellowing on lower, older leaves that progresses upward. The leaves turn uniformly light yellow-green, then yellow, then drop. The rest of the plant often continues growing, making the lower yellowing easy to dismiss early.
Phosphorus deficiency reduced vegetative biomass by 59% in the same research, making it the second most yield-damaging single-nutrient issue. Leaves show a purpling or reddish tint on the undersides, particularly along the veins, and may turn a dark, muted green before yellowing. Lower leaves are affected first.
Potassium deficiency causes brown, burnt-looking leaf edges and tips, often with a yellowish border between the dead tissue and the green leaf. It can look similar to nutrient burn but starts on the edges rather than just the tips.
Magnesium deficiency produces interveinal chlorosis: the leaf veins stay green while the tissue between them turns yellow. This is most visible on fan leaves in the mid-to-lower canopy and is one of the more visually distinctive deficiency patterns.
Calcium deficiency appears on new, upper growth as spots, brown mottling, or distorted leaf edges that curl or look stunted. Because calcium is immobile, it doesn't reach new tissue fast enough during rapid growth phases, especially in hot, low-humidity environments.
For a broader look at what healthy cannabis looks like before problems start, our post on what good weed looks like is a useful visual reference.

Deficiency Chart - Quick Reference for Growers
|
Symptom |
Location on Plant |
Likely Cause |
|
Uniform yellowing, lower leaves |
Lower/older |
Nitrogen deficiency |
|
Purple/red tints on undersides |
Lower/older |
Phosphorus deficiency |
|
Brown edges and tips |
Lower/middle |
Potassium deficiency |
|
Yellow between veins, veins stay green |
Lower/middle |
Magnesium deficiency |
|
Spots, brown mottling, new growth distorted |
Upper/new |
Calcium deficiency |
|
Interveinal yellowing, new growth pale |
Upper/new |
Iron deficiency |
|
Yellow all over, rapid decline |
Any |
pH lockout (check first) |
Cannabis Leaf Problems - Yellowing, Brown Tips, and Curling
Not every cannabis leaf problem comes from a nutrient issue. Environmental stress, overwatering, disease, and even normal plant aging can all produce similar-looking symptoms. Working through a logical sequence saves time and avoids overcorrecting.
Leaf Yellowing - The 10 Causes Growers Overlook
Yellowing is the most commonly reported leaf problem, and it has more than 10 distinct causes. The location, pattern, and accompanying signs are what separate them.
Overwatering yellows leaves from lower growth upward. The leaves look swollen, slightly shiny, and they droop downward even when they still look green. The soil feels heavy and stays wet for more than 3-4 days after watering. This is one of the most common issues in container grows.
Underwatering also causes yellowing, but the leaves look thin, papery, and limp rather than swollen. The pot lifts easily. Leaves curl inward along their length and lose their turgid appearance before yellowing.
Light burn yellows the uppermost leaves closest to the canopy, even when lower growth looks healthy. If your top leaves are yellowing but pH and nutrients are correct, raise your lights or reduce intensity.
Natural late-flowering senescence causes lower leaves to yellow and drop in the final 2-3 weeks before harvest. This is normal. The plant is redirecting resources to finishing buds. Unless yellowing is spreading rapidly upward, no intervention is needed.
Root rot (typically caused by Pythium) produces rapid, widespread wilting and yellowing across the entire plant, often suddenly. The roots appear brown, slimy, and smell unpleasant when checked. Affected plants decline quickly and don't respond to normal feeding adjustments.
Leaf Tips Turning Brown - What It Usually Means
Brown leaf tips are most often nutrient burn, meaning the plant is receiving more nutrients than it can use. The tips of leaves are where the plant deposits excess salts, and those tips brown and crisp as salt accumulates. In severe cases the tips start to curl upward and the brown tissue flakes off.
The fix is to reduce nutrient concentration and flush with pH-balanced water to clear salt buildup. Don't increase nutrients in response to brown tips, even if the rest of the leaf still looks green.
Brown tips can also be caused by:
● Potassium deficiency (tips brown with yellow margins between dead and living tissue)
● Calcium deficiency (irregular brown spots on tips and edges of new growth)
● Heat stress (tips brown rapidly during high-temperature events, often with leaf curl)
● Drought stress (brown tips appear when roots are consistently undersupplied with water)
A close look at leaf tip texture helps. Nutrient burn tips are crispy and break off cleanly. Heat-stressed tips are more tan and leathery. Calcium-deficient tips show irregular brown patches rather than a clean tip brown.
Leaf Curling - Decoding the Direction
Curl direction is one of the most useful diagnostic signals in cannabis cultivation.
Upward curling (tacoing) is a protective response. The leaf curls upward and inward to form a trough shape, reducing the surface area exposed to heat, intense light, or low humidity. Tacoing most often indicates:
● Excessive light intensity or the canopy is too close to the light source
● Temperatures above 84°F at the canopy
● Low ambient humidity (below 40%)
● Excessive airflow from fans pointed directly at leaves
Reducing light intensity by 30% resolves upward curl in many cases. Target canopy temperatures of 70-84°F and humidity of 40-65%.
Downward curling (the claw) points to a different set of causes:
● Overwatering produces soft, drooping leaves that curve down uniformly, appearing waterlogged and heavy
● Nitrogen toxicity creates a specific "claw" pattern where the leaf tips point sharply downward, and the leaves are dark green and glossy rather than pale. This distinction is critical: both overwatering and nitrogen toxicity cause downward curl, but nitrogen toxicity leaves are noticeably dark, firm, and almost waxy-looking. Overwatered leaves are limp and pale by comparison
● Root issues, including root-bound containers and root rot, produce downward, limp drooping across the plant
I've seen nitrogen toxicity misdiagnosed as overwatering more than any other leaf problem. The tell is touching the leaf: firm and dark green means toxicity; soft and slightly pale means water.
Cannabis Leaf Septoria - Identifying and Treating a Common Fungal Disease
Leaf septoria is a fungal disease that appears during flowering and can quickly defoliate a plant if left unchecked. It's caused by a fungal organism that overwinters in dead organic matter in soil and spreads via spores during wet, cool conditions, particularly when humidity is high and temperatures are moderate.
How to Identify Leaf Septoria
Septoria spots start on the lowest, oldest leaves and work their way upward as the disease progresses. The spots themselves are distinct:
● Irregular, roughly circular shapes, 15-30 mm across
● Gray-brown or tan centers
● Bright yellow or light green margins around each spot
● Pycnidia visible inside older spots: tiny black dots that are the fungal fruiting bodies
The pycnidia are the key visual marker that separates septoria from nutrient deficiency spots. Nutrient-related spots have no black dots inside them. If you see small black pinpricks inside a spot when you look closely, that's a strong confirmation of fungal infection rather than a feeding issue. Our post on mold on cannabis covers other fungal problems you might encounter alongside septoria.

How to Treat Leaf Septoria - Step by Step
Once identified, move through these steps in order:
- Remove all visibly infected leaves immediately, starting from the plant base
- Disinfect hands and any tools between touching infected and healthy plants
- Improve air circulation by spacing plants further apart and adjusting fans
- Switch to bottom watering or water early in the day so foliage dries before night
- Apply a copper-based fungicide, neem oil, or compost tea as a foliar spray
- Add Trichoderma (beneficial fungi) as a soil amendment for ongoing protection
- After infection signs clear, continue compost tea foliar spray for one additional week
Do not spray leaves in direct light during treatment. Apply foliar treatments during lights-off or during the cooler part of the day in outdoor grows.
How to Diagnose a Cannabis Leaf Problem - A Systematic Approach
Jumping straight to a diagnosis from a single symptom leads to mistakes. A systematic approach takes an extra few minutes but saves days of recovery time. Here's the sequence I follow:
- Note which part of the plant shows symptoms first. Lower/older leaves indicate mobile nutrient issues or environmental stress. Upper/newer growth indicates immobile nutrient issues or environmental burn.
- Identify the visual pattern. Uniform yellowing, interveinal yellowing, brown tips, spots, curling, or wilting each point in different directions.
- Check and correct pH before anything else. Soil target: 5.8-6.8. Hydroponics target: 5.5-6.5. A pH reading outside this range can cause nutrient lockout regardless of what's in the medium.
- Check watering. Lift the pot. Light means underwater; heavy means overwater. Inspect soil texture an inch below the surface.
- Assess environmental conditions. Canopy temperature, humidity, light distance, and fan positioning. Check if symptoms are concentrated on the side closest to a heat or airflow source.
- Check for fungal signs. Look for spots, and if spots are present, look inside them for pycnidia (black dots). If present, treat for disease rather than deficiency.
- Cross-reference symptom location against the mobile/immobile framework to narrow down the specific nutrient if feeding is the likely issue.
- Apply one correction, then wait 3-5 days before making another adjustment. Making multiple changes simultaneously makes it impossible to know what worked.
The patience in step 8 is harder than it sounds. Watching leaves continue to yellow for 3-5 days after a correction is uncomfortable. But the plant needs time to respond, and stacking multiple changes in rapid succession usually creates more problems than it solves.
Understanding which strain type you're working with also helps predict leaf behavior and sensitivity. Our guide to cannabis strain varieties covers the strain characteristics that affect cultivation responses most directly. Indica-dominant plants, for example, tend to show tighter internode spacing and broader leaves that respond differently to light stress than sativa-dominant or hybrid phenotypes. Our indica strain guide goes deeper on those growing traits.
Cannabis Leaf Uses - What to Do With Fan Leaves After Harvest
Fan leaves get trimmed during harvest, and most growers discard them. That's often the right call, but there are a few uses worth knowing.
Cannabis Leaf Tea - What It Contains and How to Make It
Tea made from fan leaves is one of the most common ways to use them outside of composting. The key thing to understand about tea is the fat-solubility of cannabinoids.
Plain cannabis leaf tea made with just water delivers a very low THC transfer of roughly 0.4-1.9% of the original cannabinoid content. Cannabinoids are fat-soluble, not water-soluble, which means they don't extract efficiently into plain water, regardless of how long you steep.
Adding a fat (cream, butter, or coconut oil) to the boiling water before steeping changes that significantly. With fat added, THC transfer rises to 53-64% of the original content. The actual psychoactive effect depends on how much cannabinoid content is in the leaves to begin with. Fan leaves contain far less than buds, so even 60% of a low starting value may not produce strong effects.
What the tea does contain, regardless of fat, is a complex phytochemical profile: 42 identified phytocannabinoids and 8 flavonoids, including cannflavins A and B, which have documented anti-inflammatory properties. This makes it interesting from a wellness perspective, even when the psychoactive effects are minimal.
Basic method for making leaf tea:
● Select a handful of fresh or dried fan leaves
● Rinse thoroughly under running water
● Bring 250 mL of water to a boil
● Add leaves and simmer for 10-15 minutes
● Strain into a cup and add sweetener if preferred
● For higher cannabinoid extraction, add a small amount of butter or coconut oil to the water before adding the leaves
Can You Smoke Cannabis Fan Leaves?
Fan leaves can be smoked, but most experienced consumers don't bother. The THC and CBD content of fan leaves is very low compared to flowers. The smoke is harsher, the experience is weaker, and the value isn't there when buds are available. Sugar leaves trimmed from buds are a different story: they carry enough trichome content to be worth including in trim runs, making them useful for kief collection, concentrates, or rolling into joints as supplemental material.
A quality grinder like the Ludist Grinder has a kief catcher built in, so everything that falls through during grinding gets collected automatically rather than lost. That collected kief from sugar leaf trimmings adds up quickly over several sessions. Trichome-rich plant material produces a meaningfully different experience than low-trichome fan leaves, and understanding why is worth the read. The entourage effect post breaks down how cannabinoids and terpenes work in combination

Keeping Your Harvest in Good Condition After the Grow
Diagnosing and fixing leaf problems during the grow only matters if you preserve the final product properly afterward. Humidity, light exposure, and air exposure are the three main factors that degrade cured flower.
Optimal long-term storage targets 62% relative humidity inside a sealed container. Too dry and terpenes evaporate; too humid and mold risk rises. Too much light (especially UV) degrades cannabinoids over time. Our guide to keeping cannabis fresh covers the full preservation method.
Getting humidity exactly right takes practice. Our post on the best humidity for storage explains the target ranges and what happens when storage drifts outside them.

For physical storage, the Ludist Stash Jar is built specifically for this. It uses a borosilicate glass body with a soft-touch matte silicone sleeve that blocks all UV rays, paired with a machined aluminum cap that creates an airtight, smell-proof seal. It holds 1 oz of flower and keeps the humidity and light conditions stable without requiring additional humidity packs inside. It's the simplest and most effective single-container solution I've found for daily-use storage.
If you need to organize multiple strains or store accessories alongside flower, the Ludist Stash Box has dedicated compartments and a lid that doubles as a rolling tray. The wheatstraw base and hardwood lid give it a noticeably cleaner look than most plastic organizers.
For rolling trim or processing sugar leaves, a dedicated surface keeps things clean and organized. The Ludist Rolling Tray is made from organically sourced ash wood with curved edges and anti-slip legs, built to handle exactly this kind of work.
What Healthy Cannabis Leaves Tell You About Your Grow
Healthy cannabis leaf appearance is a diagnostic tool in the other direction. A plant with uniform, deep-to-medium green leaves, no spots, no curl, and no browning across the canopy is communicating that pH, nutrients, water, temperature, humidity, and airflow are all within range simultaneously. That's the real goal of monitoring leaf health: prevention before problems compound.
Trichome development on sugar leaves is an additional read on plant health and harvest timing. Trichomes should progress from clear to cloudy to amber as harvest approaches. A plant under stress often shows slower or uneven trichome development. Our post on trichome damage from grinding covers what happens to trichomes post-harvest, which is relevant if you're maximizing yield from your trim.
For leaf-related terpene questions, the cannabis terpenes guide explains where terpenes are produced, stored, and how temperature affects them, all of which connects back to the leaf-level conditions you're managing during the grow.
Making the Most of Every Cannabis Leaf - Final Takeaways
Understanding what cannabis leaves are telling you is one of the highest-return skills a grower can develop. A systematic diagnosis approach, checking pH before assuming deficiency, and learning to read curl direction and spot characteristics correctly will prevent most of the mistakes that unnecessarily extend problems.
The key points to carry forward:
● Check pH before adjusting nutrients. Most deficiency symptoms in pH-correct grows respond to flushing, not feeding
● Fan leaves serve photosynthesis; sugar leaves hold trichomes and cannabinoids
● Lower leaf symptoms point to mobile nutrients; upper leaf symptoms point to immobile nutrients
● Upward curl (tacoing) indicates heat, light, or humidity stress; downward curl (claw) indicates overwatering or nitrogen toxicity
● Septoria is confirmed by pycnidia (black dots inside spots) and treated with removal, airflow improvement, and foliar fungicide
● Leaf tea without added fat delivers 0.4-1.9% THC transfer; adding cream raises it to 53-64%
When the grow is done, and you're moving into storage, the Ludist Stash Jar keeps your cannabis leaf material and buds protected from UV, air, and humidity drift through the long-term cure.

Leave a comment
This site is protected by hCaptcha and the hCaptcha Privacy Policy and Terms of Service apply.